Today’s Preventive Therapy tip is inspired by my “love” of high heeled footwear. In case you haven’t experienced my spiel about how terrible high heels are for your physical health, here is the Cliffs Notes version: Walking with heels cause the ankle to plantarflex downward creating excessive stress forces at the foot & ankle which causes compensatory muscle movements at the knee, hip, pelvis, and spine. Excessive stress forces are ALWAYS bad for the body and can cause long term changes to your body - bad changes. As a result, I’ve treated patients with foot pain, calf pain, headaches, back pain, neck pain, shoulder pain, and even jaw pain due to chronic use of high heeled footwear. Not to just seemingly pick on women’s footwear; ANY footwear with a raised heel can cause this problem when chronically worn - cowboy boots are culprits too!
However, high heels are an industry standard to certain lines of professionals and there is no avoiding them. If you must wear heels, then I highly suggest stretching these two muscles:
1)The Gastrocnemius
2)The Soleus
Both of these stretches MUST include turning the foot and pointing the toes of the foot behind inward toward your opposite heel. Without turning your foot inward, you will not experience an effective stretch. Also, do your best to keep your heel on the ground during this stretch. Both of these stretches will affect the calf of the foot behind your body.
These two stretches can relieve ankle/foot/calf pains due to changed mechanics secondary to footwear. These stretches will also prevent any adaptive changes which may make your body at higher risk of injury. Try doing these stretches before lunch, after dinner, and before you go to bed.
The levator scapula is a small banded muscle responsible for upperward rotation of the shoulder blade during arm function. However, this muscle is usually very tight and full of trigger points due the modern lifestyle and poor posture. Stretching this muscle can decrease headaches, trigger points, sore neck & shoulders, and even prevent repetitive injuries.
1. Place your right arm behind you.
2. Tilt and turn your head to your left.
3. Gently nod your head forward. You should feel a stretch on the right side and back of your neck.
4. Bring your left hand over the top of your head and pull gently leftward and downward.
5. Hold this position for 30 seconds and take slow deep breaths.
6. Reverse the directions to stretch your left side.
Remember, stretches must be held for at LEAST 30 seconds to create physiological change. This takes a minute of your time to stretch both sides of your neck. Doing this stretch every hour will absolutely change the way your neck and shoulders feel on a day to day basis.
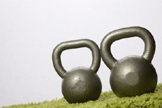
As a Physical Therapist, I have used kettlebells to rehabilitate and promote health in individuals with low back pain, shoulder impingement, ankle sprains, medial knee pain, myocardial infarction, mitral valve replacement, and much more. Who would have thought that a cast iron ball would be so clinically effective and versatile?
Like most people, when I first saw a kettlebell, I was simultaneously confused and amused. My first exposure to kettlebells happened at a martial arts seminar in San Diego when one of the instructors lugged out a 53 pound iron-wrecking-ball with a handle fused to the top of it. He called the object a “kettlebell” – it looks like a tea kettle and it swings like a church bell. He began a demonstration and spoke on the benefits and martial arts applications of kettlebell exercise. I had little interest in new trends and was much less inclined to try it out myself – that is, until I saw one of the seminar leaders struggle with the most basic and foundational exercise, the ballistic kettlebell swing.
I'm pleased to present another Kettlebell Therapy™ article on the Physical Therapy Web Space titled "Swinging Away Back Pain".
There have been estimations stating that 80% of Americans will experience back pain some time in their life1 (Web MD, Mayo Clinic). Choosing an appropriate therapeutic corrective exercise to address back pain can be quite the conundrum. One of the many goals in addressing back pain with movement is not only to modulate the pain, but to keep the pain at bay during functional activities. Of the many therapeutic exercises available to address back pain, preserving functionality can be a challenge. Correction during specific and isolated movements is more easily achieved than it is maintained during an actual functional performance.
As therapeutic relief and maintaining correct movement are central goals in movement based therapy, an ideal exercise for a back program would be that which both relieves pain and prevents further injury by fortifying functional spine mechanics. Kettlebells have recently garnished considerable attention in the world of Physical Rehabilitation. Despite the kettlebell being nothing more than a cast iron wrecking ball with a handle on top, there have been studies exploring kettlebell exercise for lower extremity sports rehabilitation2, musculoskeletal health3, and cardiovascular exercise response4, 5.
I was introduced to the EDGE tool for Instrument Assisted Soft Tissue Manipulation (IASTM) through Dr. Erson Religioso’s blog and website: www.themanualtherapist.com. After several interactions with Dr. “E,” I discerned a notable advantage to his particular design for IASTM and decided to give it a try. As a Physical Therapist with a background in Bioengineering, bio-physics & ergonomic design are pet peeve of mine. Many who have attended my national lectures have heard my advocacy for the natural physics experienced through kettlebell exercise. I have always supported the use of technologies which work with our body, rather than against our body.
When I ordered my EDGE tool, Dr. “E” immediately followed up with me to ensure shipping & billing information was accurate. I received the product in a very short amount of time and put it to use first chance I got.
I immediately noticed the difference with my first patient. In fact, after using it for only one week, I performed manual therapy on a patient without the EDGE tool and finally realized the amount of strain I have been placing on my fingers all this time! The shape and multi-surface design of the EDGE tool allows for all ranges of tissue regions to be accessed and manipulated. Furthermore, the ergonomic design provides the clinician leverage on tissues with minimal strain to themselves. The EDGE is an effective clinical tool, a beneficial experience to patients, and ultimately, the return of investment as a preventive measure to manual clinicians is incredible!
Reflecting on this time of year & the spirit of Christmas & the Holiday Season, I recently rediscovered that the English word “Therapy” is rooted in the Greek word “Therapeia”.
Of the various translated definitions of this word, two caught my eye:
A Treatment for Healing, Curing (of the sick, aka. "to make well")
A Service done to the sick
I remember a while back, a motivational speaker referred to the Greek word “Therapeia” to confer a cultural meaning of healing, restoration, and improvement of one’s well-being. It is now widely accepted that health is not just the absence of disease but is a comprehensive state of well-being.
Contemplating on these thoughts, I reminded myself that there are many doctors in the world who care for many people in the scopes of their respective professions. There are allopathic physicians, osteopathic physicians, philosophy doctors, pharmacists, physical therapists, psychologists, optometrists, dentists, podiatrists, acupuncturists, chiropractors, naturopathic physicians, oriental medicine physicians, ayurvedic medicine physicians, family therapists… the list goes on and on.
I, myself, as a Doctor of Physical Therapy am ultimately a “therapeutic doctor” – a therapist; my services and skills must hold true to the root purpose of “therapeia” - healing, restoration, ... to make well. As a Physical Therapist, a compassionate understanding of the human experience is pivotal in being not only an effective clinician, but a welcome expert in the eyes of my patients & clients.
I encourage all to reflect on “Therapeia” – what it means to you – as a patient, client, or clinician, AND, what you are doing about it.
Training healthy abdominals requires an artistic balance of muscular strength and movement control.For the core to truly be functional and effective at preventing back injuries, one must address both aspects of core training.More often than not, “strong” individuals engage in lifting activities with “rock solid” abs. For many of these individuals, their control of the abdominals, and thus, the control of segmental stabilization of the spine is poor. A hypermobile spine during exertional activities amounts to a major risk of spinal injury.
The supine position is a good starting point for training the abdominal muscles.One of the safer and more efficient exercises that address abdominal strength in a controlled dynamic movement is the “Pull Over”. The Pull Over consists of a supine posterior pelvic tilt combined with glenohumeral extension. The combined motion sandwiches the core with the upper and lower quarters of the body forcing it into a controlled and co-activated contraction.
To begin, one must eliminate lumbar lordosis by flattening the “small” of the low back to the ground. This can be done by tightening the abdominals and relaxing the legs.Other cues can be drawing in your belly, or, hollowing out your belly.The lordosis of the lumbar spine should be so eliminated that one cannot slide a piece of paper under the low back.It is only then that the core is properly engaged and bracing the spine for controlled activity.
This is an example of excessive lumbar lordosis.
This is an example of “core bracing” where the core is engaged and lordosis is eliminated.
Begin the pull over by reaching for the kettlebell and ...
... pulling it "over" your head into the “Driver’s” position.
To maximize core contraction and even engage the shoulder girdle, bring the kettlebell into the “Pull Back” position.
One can then make this pattern a dynamic exercise by repeating the pull over.
Of course, one can get increasingly creative by involving lower extremity extensions both unilateral and bilateral – really, the sky’s the limit for these mat exercises.
Finally, I’d like to introduce you to my patient, client, and friend – Jacob.Jacob was kind enough to provide us a video testimonial regarding his experience with Kettlebell Therapy.I’m truly proud of Jacob for the manner in which he handled injury, and, his positive attitude and perseverance to not just recover, but to excel.
Coming up:I will be speaking at the National Speaking of Women’s Health conference sponsored by Sharp Healthcare in San Diego.The topic: “Melting Fat in 15 Minutes: An Introduction to Kettlebell Exercise”.Also, I’ll be in the Expo hall exhibiting the Physio Health & Fitness Screen. Click here to register!
As I have received a lot of questions regarding knee health in the past months, I felt that addressing a couple basic screening tools and a corrective exercise to begin the path of achieving knee health would be a great topic for Kettlebell Therapy.
The knee joint is the unlucky cousin of the ankle/foot and hip. The muscles of the hip act as a controlling guide-wire to the orientation of the femur itself. In stance, the muscles in the ankle/foot control the orientation of the tibia. Therefore, the movement of the knee is dependent on the control at the ankle/foot as well as the strength in the hip girdle.
As discussed in the Functional Wall Squat posts, the proper mechanics of the knee in normal ambulation or squatting is that of having the knee itself follow the path of the toes, free of any knock kneed or bow legged postures. However, it is within the window of normality to see some amounts knock kneed and/or bow legged postures in a healthy individual. It is when these postures are accompanied with functional deviations that we then become at higher risk for injury.
Here are two screening tools for the knee:
Thessaly’s Test
This special orthopedic test is typically used by Physical Therapists and Orthopedic Surgeons to screen out meniscal tears of the knee. It is a very sensitive and specific test when done in 20 degrees of knee flexion and is quite reliable for screening out tears. Any catch or reproduction in pain is a positive test. If this is indeed positive, a medical referral may be recommended prior to further exercise.
The Drop Vertical Jump
Functionally, the knee can be stressed in several dimensions during activity. The Drop Vertical Jump is a clever way to screen for weak hip external rotators and weak hip abductors during landing (eccentric squatting) which is basically asking for an ACL tear sometime in the future. A positive screening would be a landing with internally rotated and adducted (knock kneed) femurs. This can also screen for weakness at the ankle/foot which would result in excessive pronation during landing.
Here is how to do it: Have person jump off of a box and land, controlling their descent. While there are variations at various performance levels, the analysis is largely the same. The important data is checking for dynamic control at the knee which informs us of the strength and coordination at the hip and ankle/foot.
Something that I constantly stress to my patients, clients, and students is that our bodies are perpetual victims of earthbound gravity. As the human body mostly functions in a bipedal mode, it is important for us to see our functional movements from a ground up perspective. For the knee, this means we must give special attention to the mechanics at the ankle/foot as it is the primary point of contact and foundation for our function in stance.
Coming up: Blasting Abs With Kettlebells. In my next post, I will introduce some foundational aspects of combining mat exercises with kettlebells.
Like most people, when I first saw a kettlebell, I was simultaneously confused and amused. My first exposure to kettlebells happened at a martial arts seminar in San Diego when one of the instructors lugged out a 53 pound iron-wrecking-ball with a handle fused to the top of it. He called the object a "kettlebell" – it looks like a tea kettle and it swings like a church bell. He began a demonstration and spoke on the benefits and martial arts applications of kettlebell exercise. I had little interest in new trends and was much less inclined to try it out myself – that is, until I saw one of the seminar leaders struggle with the most basic and foundational exercise, the ballistic kettlebell swing.
In the last 5 posts regarding the Functional Wall Squat (FWS), we’ve discussed the foundational knowledge of ideal posture, the FWS as a Physiotherapy (PT) functional assessment, and the FWS as a PT intervention. In this closing post of the FWS series, I will discuss the Functional Wall Squat as Preventive Therapy and as a modality of exercise.
Below is a sequence of corrections to common functional deviations seen during the FWS assessment:
Thoracic Kyphosis with Rounded Shoulders & Head Forward Position: This deviation is particularly common in the computer and desk job populations. This risk includes (and are not limited to) poor lifting mechanics, musculoskeletal discomfort due to muscular imbalance, headaches, compression fractures, and nerve compression.
To correct this, begin with shoulder retraction. Tell the individual to pinch their shoulder blades together.
Ensure that the scapulae retract posteriorly and slightly inferiorly to avoid activating the upper traps.
Then incorporate thoracic spine extension with pushing the chest out.
Finally, encourage cervical spine retraction/elongation which should naturally occur as a process of the scapular and thoracic spine corrections.
From here, cue the individual to engage in a mini-squat and lower until the next deviation which is typically…
Flat Back & Posterior Leaning: Flat back tends to happen with weak lumbar spine extensors and a stiff lumbo-pelvic girdle. Flat back is also associated with posterior leaning. This occurs as a mismatched balance strategy – as one squats, ones center of gravity will shift. In order to balance, the proper strategy is to move into a spinal extension bias and shifting the lower trunk posteriorly and maintaining the upper trunk anteriorly over ones base of support.
However, if one has a flat back deviation, the only available strategy is to move the upper trunk. Since the flat back naturally shifts lower trunk weight anteriorly, the only option for the upper trunk is to shift weight and lean posteriorly to maintain balance.
In general, posterior lean can occur during a functional squat due to several factors including:
Tightness in the Lumbo-Pelvic girdle (primarily Hip Flexors)
Weakness in the Lumbar Spine Erectors
Weak Hip Extensors / Over-dominant Knee extensors
Tightness in the Muscles of the Calves (Plantarflexors)
Weakness in the Ankle Dorsiflexors
To correct this during the FWS:
Begin with cuing the individual to stick out his/her buttocks.
Next, instruct the individual to accentuate the lumbar lordosis “C” curve of the low back.
Continue with tactile cuing of the thoracic spinal erectors by drawing the scapulae together with your fingers in a pinching manner.
Combine this neuromuscular facilitation with downward & posterior pressure to the ASIS to encourage anterior pelvic tilt as such will accentuate the favored spinal extension bias and prevent the next functional deviation…
Lower Quarter Torsion and/or Collapse: Weakness in the hips is most commonly expressed with deviations in the knee and ankle/foot joints. Most commonly seen is the combination of genu valgum combined with internal rotation of the femur and resulting in pes planus (excessive pronation of the ankle/foot).
Genu Valgum: The knock kneed position is most commonly a result of a weak gluteus medius.With poor hip abduction control, the femur easily veers medially.To correct this functional deviation, instruct the individual to favor their knees outside their base of support.
Internal Rotation of the femur: Weak Hip External Rotators allow for the femurs to excessive internal rotation which also contributing to genu valgum.To correct this functional deviation, instruct the individual to point their knees away from midline.
Pes Planus: Weakness in the muscles of the arch contributes to this functional deviation. To correct this functional deviation, instruct the individual to hollow out the foot into a cave along with the corrections above.
For the purpose of this video demonstration, the anterior view is given:
As you can see, this sequence of Neuromuscular Re-education can correct and re-sequencing lifting, squatting, and postural mechanics. The result is a habitual lifestyle of good movement in ideal body mechanics – this spells PREVENTION.
The Functional Wall Squat (FWS) as a modality of exercise:
Once the sequence of the FWS is perfected, one can move into the overloading principle of exercise physiology into strengthening and conditioning.Here are a few variations to the FWS as an exercise shown in the following order:
Functional Wall Squat, Horn’s Grip Position
Functional Wall Squat, Suitcase Grip
Functional Wall Squat, One Handed Clean Position
Functional Wall Squat, Press Squat variation
The guiding principle behind good exercise is and will always be proper biomechanics. The Functional Wall Squat (FWS) is a versatile exercise which can be used to assess functional deviations, neuromuscularly re-sequence movement patterns, and strengthen proper biomechanics to prevent future impairments.Used as a foundational exercise to lifting mechanics and postural correction, the FWS is a strong base for a successful building.
Coming up: Preventing Knee Injury with Kettlebell Therapy. In my next post, I will discuss an exercise I introduced at the 2010 National Speaking of Women’s Health Conference specifically addressing gluteus medius weakness, and, will discuss a screening exercise for the dynamic integrity of the knee joint.
The beauty of the FWS is that the assessment and intervention goes hand in hand. As previously discussed, any deviation from the ideal postures of the body during the functional squat is an immediate identification of functional impairments. Intervention for identified impairments is best done by correcting the postural deviations during the functional activity itself.
For example: If someone were to squat and find that their knees knock together during a particular range of the squat, one would correct this by cuing the person (verbally, visually, or tactilely) to perform the squat with the knees specifically bowing out. The result of the two extremes would be a more neutral posture of the knees. The best result is achieved by holding one’s form at the brink of any deviation and isometrically holding that stance for a 15-30 second hold. After the isometric hold is completed, resume full stance and begin repetitions – slowly inching lower and lower while preserving ideal FWS mechanics..
Another example: If someone squats and tends to make contact with the wall with their face or chest, one would correct this by cuing the person to take half a step away from the wall and perform the squat with an extension bias until contact with the wall, or, until spinal flexion occurs. Again, at that time, stop once the deviation occurs (wall contact and/or spinal flexion) – correct the posture, and, isometrically hold the range then resume full stance with repetitions.
This is an example neuromuscular re-education. Neuromuscular re-education is one of the many unique clinical interventions used by Physical Therapists (PT’s) to improve balance, coordination, posture, kinesthetic sense, proprioception, and ultimately function. Neuromuscular re-education ranges in form such as use of visual cues from a mirror, tactile cues from a wall, or facilitated movements from highly skilled manual techniques such as Proprioceptive Neuromuscular Facilitation (PNF).
On a side note: I mentioned Physical Therapy and Physiotherapy are interchangeable terms. Personally, I prefer the use of Physiotherapy and see myself as a Physiotherapist (PT). Internationally, physiotherapy is the preferred term for the profession as it more accurately describes the profession as a whole. “Physio” denotes the practitioner addresses the physiology (not just the physical) of the entire body in regards to function, movement, health and wellness.
Coming up: Breaking Down The Functional Wall Squat (Part 6). In this final segment of Breaking Down the FWS, I will discuss the use of the FWS as an instrument of Preventive Therapy and as a modality of exercise. I will also include videos of the FWS as corrective and preventive neuromuscular re-education.
Now that we’ve completed our discussion on ideal posture, we can integrate that study with the application of the Functional Wall Squat (FWS) and its use as a functional assessment.
The goal of the FWS is to reduce stress forces experienced by the body by preserving ideal posture & correct mechanics. By doing this, the risk of injury is greatly reduced during functional activities.
Let us revisit the video of the Functional Wall Squat:
As you can see, the FWS is performed by facing a wall as closely as possible. Once aligned with the wall, the person is to squat as low as possible without making physical contact with the wall. By doing so, spinal posture is maintained, or, placed in an extension bias (the opposite of spinal flexion). In general, spinal flexion (slouching and bending forward) is quite deleterious especially in lifting and squatting activities. This is because spinal flexion combined with external forces places an incredible amount of stress forces on the inter-vertebral discs of the spine. In fact, the most common etiology of herniated discs is repetitive spinal flexion while lifting objects. Thus, the extension bias is a very important tool of prevention to injurious flexion postures and is the preferred posture if ideal posture is not achievable due to limitations in strength or range of motion.
Throughout the FWS itself, one focus on the following:
The distance of the sternum and navel is not to shorten as to encourage neutral spine and/or achieve a preventive extension bias.
Hip hinging the trunk over the hip joint is acceptable so long as the first condition is preserved and/or spinal flexion is avoided.
Accentuation of lumbar lordosis (the “C” curvature of the low back) is encouraged as a preventive measure to protect your spinal discs.
Engage Core Bracing: This is done by exhalation during exertion (squatting/standing). By breathing out through your mouth in a whistling manner or the making of a hissing sound through your lips, the external and internal core musculature co-contracts to create a unified trunk which protects the tissues of the spine.
Utilize the gluteals: The hips and pelvis is the structural foundation of the spine. A strong foundation makes for a secure building. Specifically engaging the gluteals during the squat is a key element of the FWS.
Ensure the knees follow the path of the foot/ankle: One must avoid genu valgum (knock knee) or genu varus (bow leg) and preserve the path of the knee to follow the direction of the foot/ankle. Doing so protects the knee from excessive stress.
Ensure the foot/ankle maintains foot forward posture.
Keep the scapulae retracted.
Maintain Cervical Spine Elongation.
Maintain Neck Retraction (Chin Tuck).
The Functional Wall Squat as a functional assessment:
When someone performs the FWS, it is important to note any asymmetry or deviation in posture which may indicate functional limitations in flexibility, balance, and/or strength. The most common deviations are segmental weakness in the spine yielding spinal flexion, and, poor control of lower extremity orientation. Segmental weakness is best identified by a hinge/hump in spinal posture during performance of the FWS. The sharpest angle of spinal segmental dissociation is the weakest functional link in the spine and must be first addressed by Preventive Therapy. Poor control of the lower quarter is typically expressed with the dissociation of the knees from the ankle/foot path during the squat due to weakness of the hip girdle or ankle/foot. The same logic can be applied to all areas of the body as a functional assessment of dynamic posture during the functional squat. Any areas of weakness, hypermobility, hypomobility, disturbances in balance, or deviations from the ideal posture during the FWS immediately become identified functional impairments which can be effectively addressed by Kettlebell Therapy.
In my previous post, I discussed the importance of ideal posture as a foundational component of health and wellness. In this post, I will expand on ideal posture and how it relates to preventive therapy, health and wellness, and lay the foundation to understanding The Functional Wall Squat.
Lower Trunk & Lower Quarter Posture
In this diagram, the entire body is depicted to demonstrate whole body ideal posture. I like using this diagram because it expands on the previous and also demonstrates frontal plane postural symmetry. In this discussion, it is helpful to remember we are not completely symmetric creatures - it is natural and normal to have one shoulder slightly elevated or one hand slightly larger than the other. However, frontal plane posture should be reasonably symmetrical. The second half of this diagram once again depicts sagittal posture which is the more interesting of the two.
Here are the components of ideal posture in the upright (sitting/standing) position for the Lower Trunk & Lower Quarter Posture:
Stomach In: Tightening the abdominals is an important aspect of spine health as it causes a co-contraction of the core muscles as a whole. This includes the very important interspinous muscles which form a type of tri-weave around the spine to create a strong stable structure.
Pelvic at Neutral Rotation: For most people the pelvis is anteriorly rotated where the abdominals are stretched, the buttocks are raised, and the curvature of the low back is accentuated. This is typically due to tight hip flexors, tight low back paraspinal muscles, weak gluteals, and weak abdominals. As the pelvis and hips are the foundation of the core, this is a key aspect I look for in my patients and clients.
Hip at neutral rotation: Recent scientific literature has suggested that the hips are the most important link of the lower extremities. From a biomechanics perspective, this makes perfect sense. The orientation of the hips act as a guide-wire for all of the other muscles below which then must respond to reaction forces during weight bearing activities. To find your position of neutral hip rotation, feel for a boney prominence called the “greater trochanter” which lies on the side of your upper thigh at the level of the lower pelvis. Turn your leg in and out and you will feel the boney prominence reveal itself through the musculature. When the greater trochanter is pointing to your side and away from you, you have just found the neutral rotation of your hip.
Knee’s in-line: The knee is known as the unlucky cousin of the hip and ankle. As it is sandwiched between the anchor point of the lower extremity to the core and the weight bearing structure of the ankle/foot, the knee received and absorbs the majority of stress forces during movement and function. For women, this is especially true since women have a slightly wider pelvic girdle than men predisposing women to a genu valgum (“knock kneed”) posture. The Kettlebell Therapy solution to this will be discussed in future posts.
Knee and Shin at Neutral Rotation: It is important that the knee and shin are held at neutral rotation as well. Excessively rotated joints in this region can cause undue stresses which result in knee pain, ankle/foot pain, hip pain, and even back pain. You can generally achieve neutral rotation at the knee and shin by finding the crest of the tibia (the long thin boney prominence in the front of your shin) and pointing it forward. Don’t trust your knee caps as a sign of knee rotation as it can be pulled out of alignment by poor muscular balance.
Ankle and Foot Forward: To achieve ideal ankle/foot position, you can generally point your feet forward so that the boney prominence on the outside of your ankles (lateral malleolus) are pointing to your side and aware from you.
Coming up: Breaking Down The Functional Wall Squat (Part 4). In my next post, I will integrate ideal posture with the dynamic movement of the Functional Wall Squat (FWS) and discuss the FWS as a functional assessment.
In my previous post, I discussed the importance of ideal posture as a foundational component of health and wellness. In this post, I will expand on ideal posture and how it relates to preventive therapy, health and wellness, and lay the foundation to understanding The Functional Wall Squat.
The functional definition for posture is the starting point for body movement. As ideal posture is the most neutral, stress relieving position of the body, it is the also the optimal starting point for movement and function. Let’s examine the posture of the upper trunk.
Upper Trunk Posture
Here is the diagram I use to depict ideal upper trunk posture to my patient’s in the weekly pre-operative spine class:
Upper Trunk Posture includes considerations for the position and orientation of the head, neck, shoulders, cervical spine, thoracic spine, the scapulae (shoulder blades), and the upper extremities (shoulders, elbows, wrists, and hands).
For the upper trunk posture, the sagittal view (or side view) of the body is the most clinical interesting as it is in this view where the majority of one’s postural health is revealed in this region of the body.
Here are the components of ideal posture in the upright (sitting/standing) position:
Neutral Head Tilt: Looking straight ahead is the best way to achieve neutral head tilt. Excessive downward or upward gazing can cause undue stress on the neck and spine. Typically we go where we look, so, look straight ahead! Doing this will protect your posture and achieve neutral head tilt.
Cervical Spine Elongation: Imagine someone is pulling at the top of your head trying to make your spine longer.
Neck Retraction (Chin Tuck): This is bringing the chin directly back so that the head is over the shoulders and not in front (as is shown in the “BAD” diagram). This is done while maintaining a neutral head tilt to avoid nodding or upward gazing. While this may be slightly redundant as cervical spine elongation naturally is accompanied with cervical retraction, this postural component is absolutely critical to upper trunk health. Thus, I double my efforts to reinforce this aspect of postural wellness.
Thoracic Spine Extension: Sitting and Standing Tall is a natural way to cue the thoracic spine to extend, elongate, and avoid the flexed and hunched posture which gravity mercilessly influences us to conform to. A tall thoracic spine minimizes stress forces and is so important, it is usually the first order of business to prevent injuries from osteoporosis.
Scapular Retraction: This is the act of bringing the shoulder blades together as if you are pinching them together. This requires for the muscles of the Rhomboids, Middle Trapezius, and Lower Trapezius to co-contract to put the shoulder blades in ideal posture. Caution: The Rhomboids are also downward rotators of the scapula and can be a contributing factor to rotator cuff impingement. A muscular balance must be emphasized to achieve ideal posture of the scapulae.
Relaxed Upper Extremities: Many people carry stress in their shoulders and arms. In doing so, the shoulders are typically elevated and the arms are in a gripped and/or flexed position. The increase of tone in these muscles naturally lead to increased tone throughout the body which can cause poor posture, muscle cramps, trigger points, and other impairments which can be quickly resolved with Kettlebell Therapy.
Coming up: Breaking Down The Functional Wall Squat (Part 3). In my next post, I will expand on ideal posture as the foundation for The Functional Wall Squat and discuss Lower Trunk and Lower Quarter Posture in detail.
The next several posts will be a topical series on the Functional Wall Squat.
The Functional Wall Squat is one of my favorite exercises used for Kettlebell Therapy. The use of a wall as a visual and tactile cue has unlimited applications in preventive therapy which naturally expands to health and wellness. Typically, wall exercises are done while leaning against the wall. The functional wall squat is one of those rare exercises which are done while facing the wall. The concept is that of using a solid structure as a guide-wire to postural mechanics and squat mechanics. However, to even begin discussion on the squat itself, we must first discuss posture.
Posture is the position and orientation of the body’s trunk, limbs, joints, and tissues. Posture affects every system of our body such as our spine, joints, heart, lungs, bladder, and much more. It is important for us to train our bodies to recognize and adopt ideal postures as unconscious habit. Good posture promotes good health, bad posture leads to injury and/or illness.
Since good posture promotes good health, it is important to discuss the concept of an “ideal posture”. An ideal posture is the best position and orientation of the body in which internal and external forces are minimized. Posture is generally situational as we are not always in the same orientation in space every second of every day. In 24 hours, the human body can be supine, prone, side lying, sitting, squatting, standing, extending, flexing, rotating, reaching, bridging, kneeling, etc. Throughout the day, the body is victim of its own internal forces (muscle contractions, internal pressure, tissue tension, etc.), AND, external forces (gravity, the environment at large, ergonomics, etc.). It is through ideal posture that we can minimize these stress forces which can be damaging, and thus, preserve the body’s wellness.
As the Primary Spine Physiotherapist of a major hospital in the Greater San Diego Area, I care for the physiological functional health of 1200-1400 patients a year. Of those, I’m responsible for the better part of 800-1000 spine patients in a given year. I can tell you from both scientific literature and clinical experience that posture is the one of the foundational components of health and wellness.
Coming up: Breaking Down The Functional Wall Squat (Part 2). In the upcoming posts, I will give two diagrams I use for my weekly pre-operative spine class which depict ideal posture to lay down the foundation for The Functional Wall Squat.
4. Roman Chair Back Extension:Theoretically strengthens the erector spinae.
The DANGER: Resisted spinal flexion while loading the spine can dangerously increases the risk of damaging the inter-vertebral discs. Damaged inter-vertebral can cause incredible pain, nerve damage, and even paralysis. In fact, this very motion is forbidden to spine patients after surgery because of how detrimental it can be to the spine.
Kettlebell Therapy: The Functional Wall Squat – The functional wall squat is a physiokinetic exercise that strategically optimizes body mechanics and spine health. The best way to strengthen the muscles of the back is to do so functionally. This is because the body is very sensitive to activity specific training effects. We typically use the erector spinae when we are lifting objects. By isolating the erector spinae on the roman chair, the body will not recruit the erector spinae and the deeper spine muscles to stabilize our vertebrae at the critical moment of lifting. The functional wall squat is a powerful physiokinetic exercise that re-trains spinal stability, lifting mechanics, and strengthens the muscles of the back, functionally.
5. Roman Chair Sit-Up: Theoretically this exercise strengthens abdominals and hip flexors.
The DANGER: The sit-up/crunching motion yields the same spinal flexion movements which increases stress forces on the spine in a similar manner to the Roman Chair Back Extensions. The spine health maxim I encourage my patients and clients to adopt is: “never change the distance between the sternum and the navel.”
Kettlebell Therapy: The prone series progression of the plank toward the bear crawls are an excellent series to strengthen not only the abdominals and hip flexors – it also strengthens the ankle stabilizers, muscles of the knee, the upper core, the chest, the shoulder girdle, the triceps, and the wrist stabilizers.
The Plank (Full Plank)
This concludes my 5 WORST Gym Machines and the Kettlebell Therapy Solutions. I will expand on all these exercises in future posts as well as their roles in Preventive Therapy.
Coming up: Delayed Onset Muscle Soreness. So many of my students and clients love telling me, “There are muscles in places I never knew!” Find out more about this phenomenon in my next post.